How To Connect AT&T U-verse Modem? [Step-by-Step Guide]


Did you just subscribe to the AT&T U-verse internet and are now looking for ways to connect a modem to the network? It’s an easy process, and it shall take about 20 minutes to get it up and running.
In this article, I shall list the things you need before connecting an AT&T U-verse modem to the network, followed by a step-by-step guide. So, let’s begin!
Prerequisites
- Working internet connection
- LAN cable (For wired connections)
- Working telephone (For VoIP connections)
- Model insights, network name, and password (supplied right out of the box)
- Functional power cord
- Green data cable for a standard DSL connection
Note: ISP-supplied gateways are underpowered, with average specs and sub-par performance. For the best experience, I suggest you get a good third-party router for ATT U-verse and enjoy higher speeds, security, and control.
How To Connect AT&T U-verse Modem?
Now that the elementary allocation is out of the way, here is a step-pronged approach to setting up the AT&T U-verse modem in 2025:
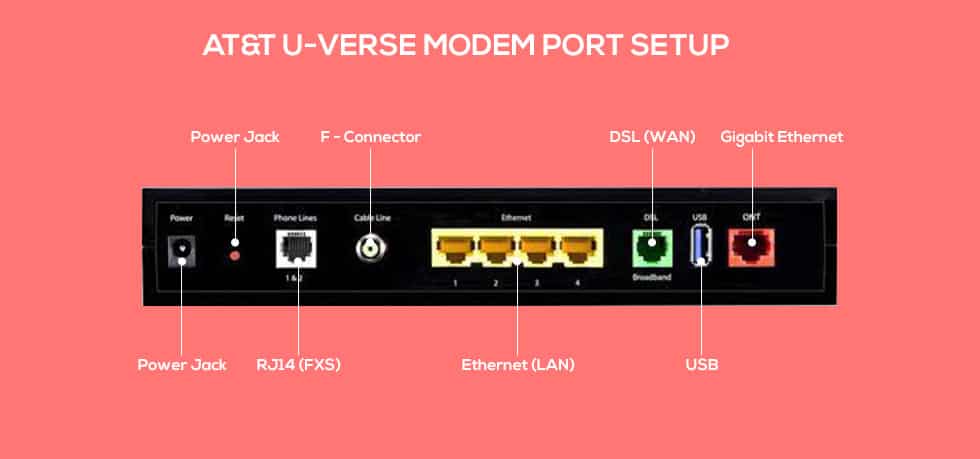
Step 1: Take the modem and keep the details handy.
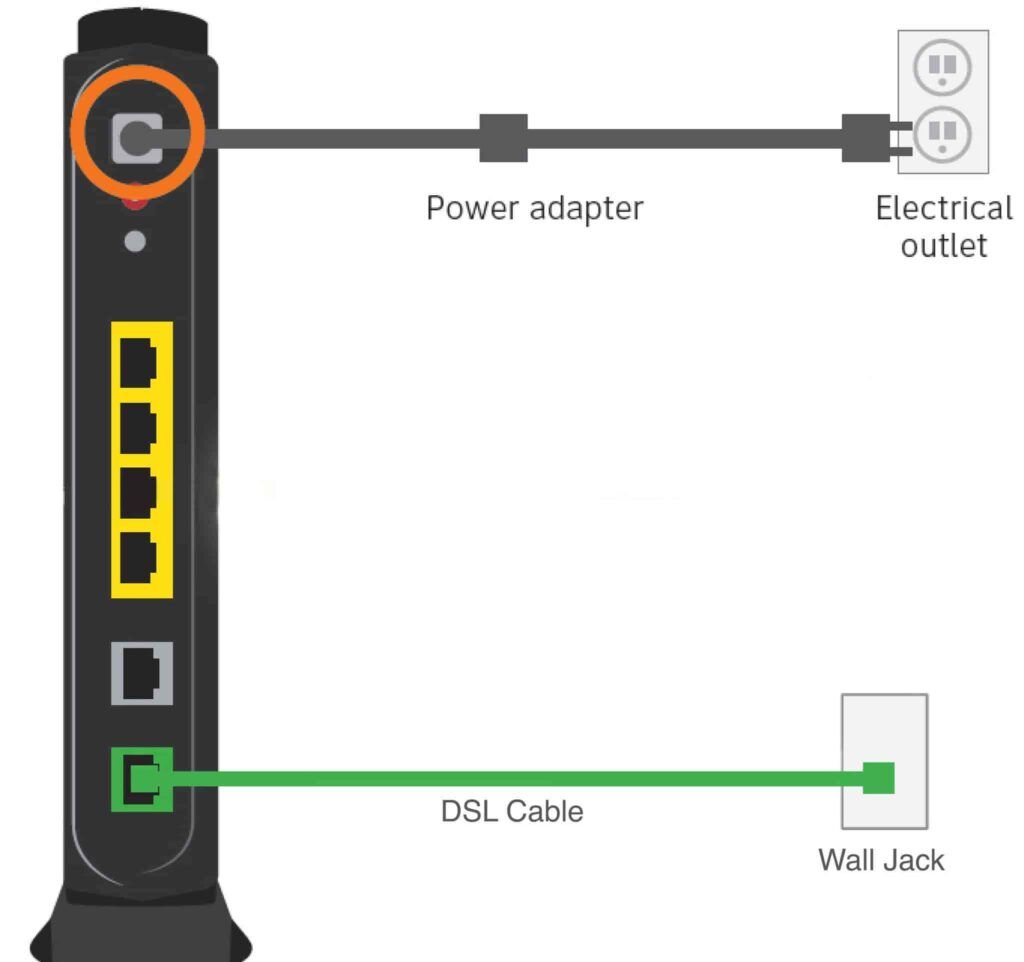
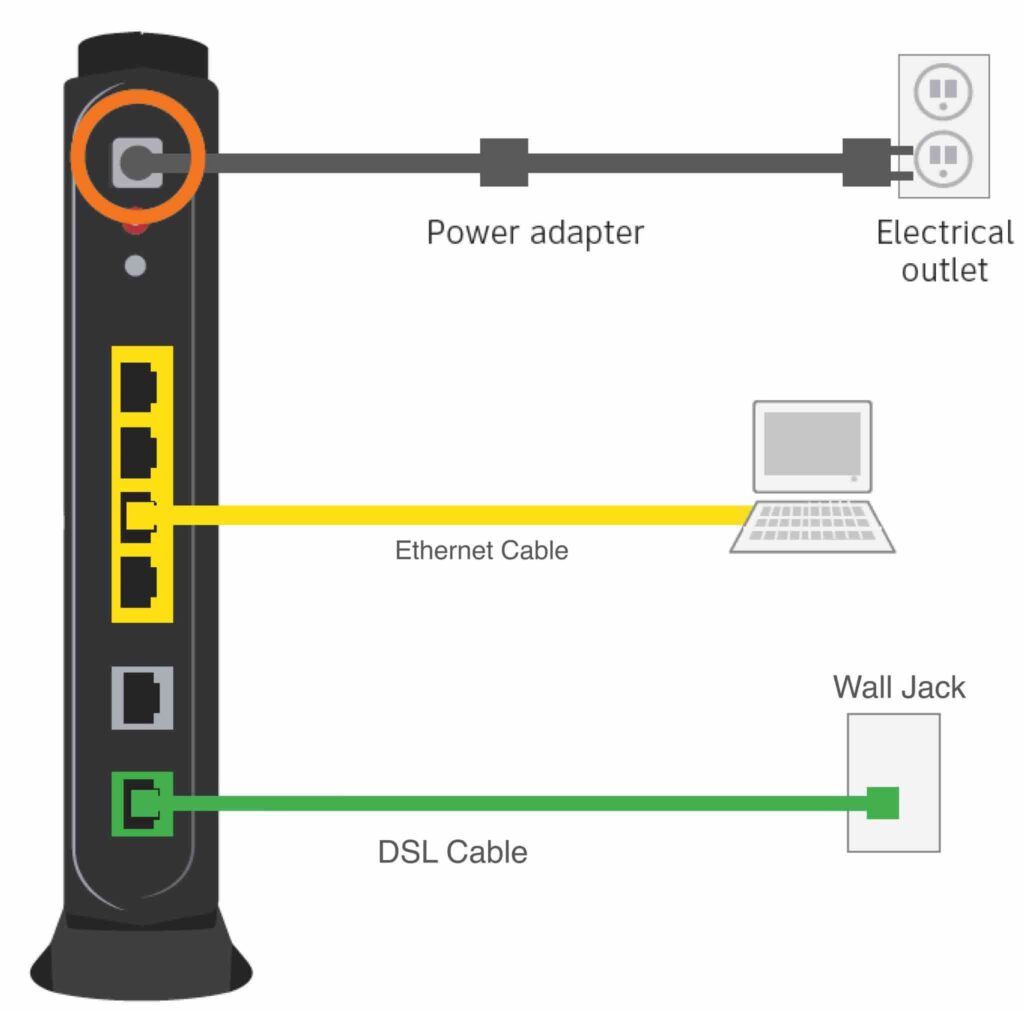
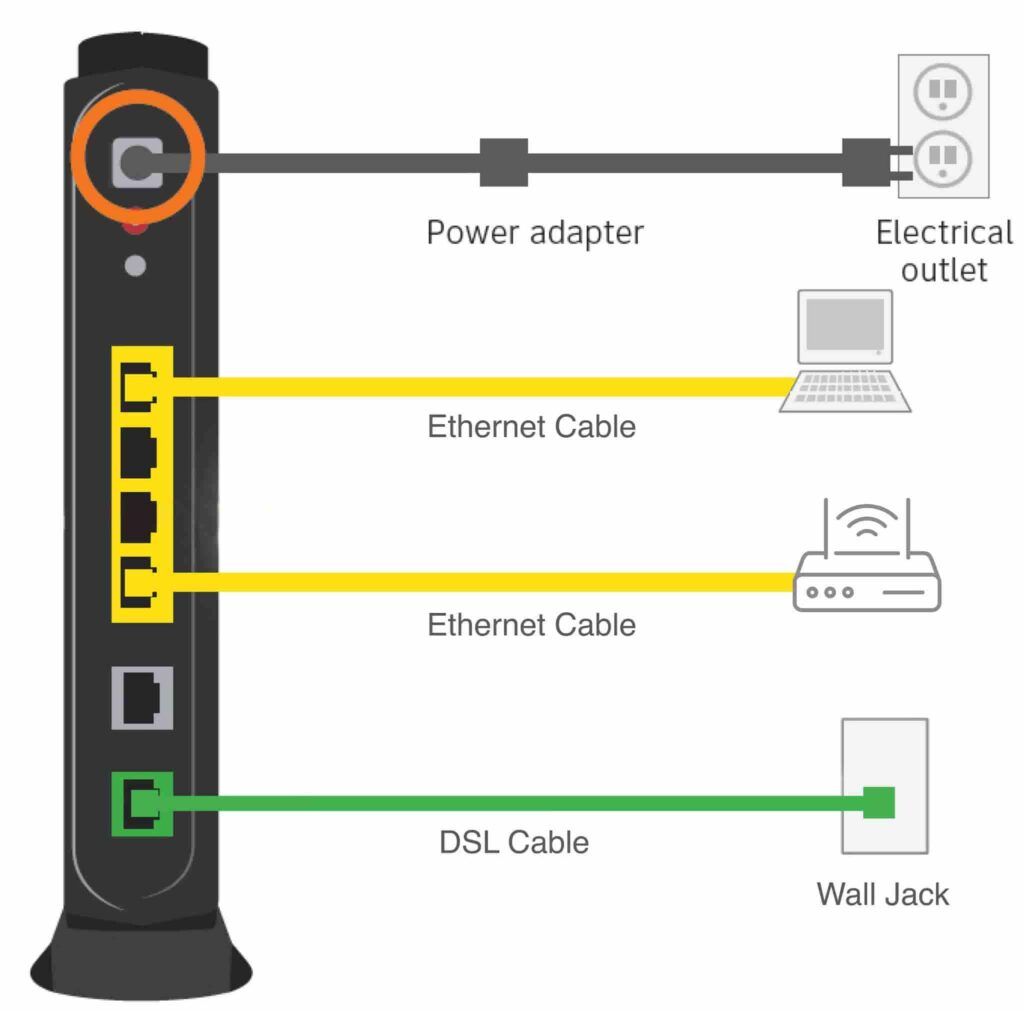
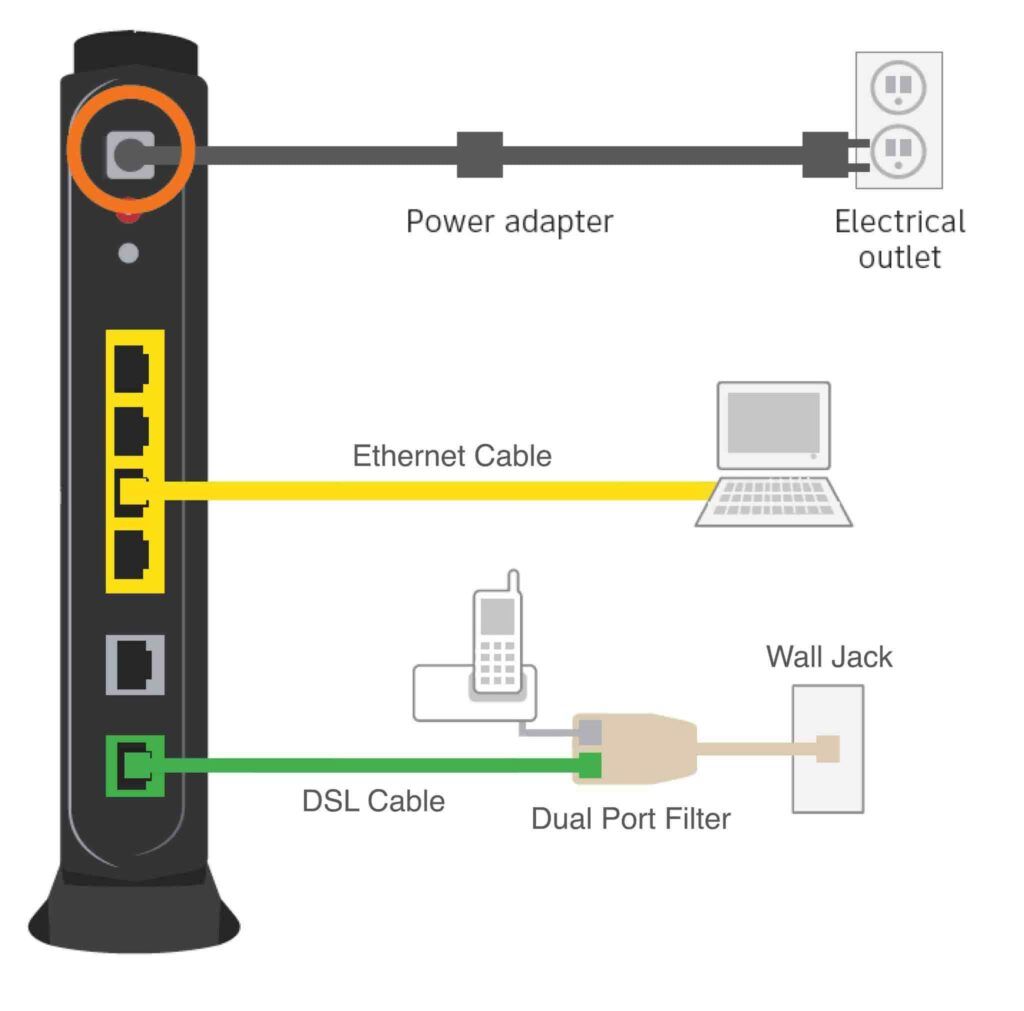
Step 2: Connect the DSL data cable to the DSL/Broadband end of the modem, marked in green. Also, connect the power adapter to the electrical outlet but don’t power on for now.
Note: If you have a Fiber optic cable internet service provider supplying internet, you can purchase a separate cable to connect the same to the AT&T U-verse Modem.
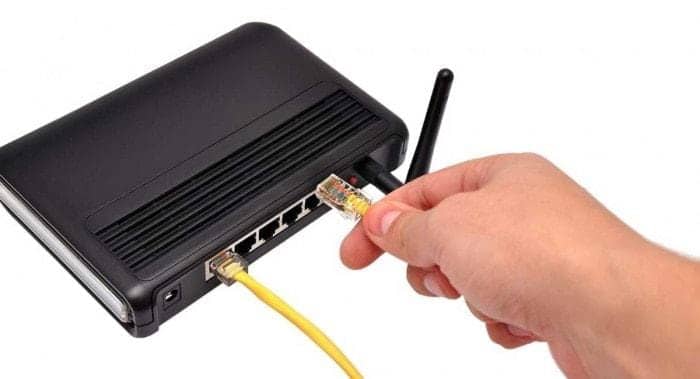
Step 3: Once the internet connection is sorted, you can use the yellow-color ethernet cable to establish a direct, wired connection with the computer or any other device.
Step 4: If you have an additional ethernet port by your side, you can connect the AT&T U-verse Modem to another external router.
Step 5: Also, if you have a working landline phone by your side, you can attach the Dual Port Filter, add a DSL cable in the DSL port and connect the RJ11 cable to the phone port to make it a fully functional telephony modem to set up a VoIP connection.
👉 Related reading: Is AT&T Next Up Worth It?
Note: The AT&T U-verse Modem also works with a cable internet service provider as there is a full-fledged coaxial input to work with.
Step 6: Once all the connections are established, you can power on the modem.
Step 7: Once the device is on, you can log into the web interface and complete the registration to get the device activated.
Note: For select internet connections, the AT&T U-verse Modem even supports self-activation.
Step 8: For wireless access, check for the model name to appear on the device and then log in using the credentials provided with the gateway modem in the first place.
Step 9: Additionally, if you want to explore the IP telephony features, you need to head over to after logging onto the internet and managing the VoIP attributes at will.
Conclusion
The AT&T U-verse modem is an all-in-one networking device that covers every base with ease. And what clicks is that once you have invested in this device, you can use any internet and Voice plan, provided you follow the self-explanatory steps to connect to the online world.