How To Set Up Linksys WiFi Extender? [2 Easy Methods]

Have you finally got a Linksys WiFi range extender to eliminate the network dead spots in your home or office? Do you need help getting it up and running? This article walks you through two different ways to configure your Linksys extender.
The first is using the web interface, and the second one is via the WPS button. I shall also address some common issues that many users encounter during the setup. So let’s begin without further ado!
How To Set Up a Linksys Extender?
You’ll need the extender, power adapter, main router’s details, and a phone or computer. Before setting up, you must place the extender correctly. Once done, plug the extender into an electrical outlet nearby, and start following any of the below methods.
Method 1: Using a Web GUI
This method involves accessing the Linksys extender’s setup page through a web browser on a computer or mobile that’s connected to the network.
Steps To Set Up Using a Web Browser:
Step 1: Plug in the extender to a power outlet.
Step 2: Wait for the extender’s LED lights to start blinking amber.

Step 3: Connect a computer to the extender’s WiFi network.
Step 4: Open a web browser and enter the extender’s IP address in the address bar. The default IP address is usually 192.168.1.1.
Step 5: Enter the login credentials (generally “admin” for both) to log in to the extender’s web-based setup page.
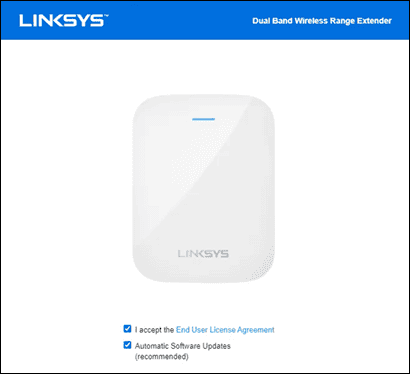
Step 6: Follow the on-screen instructions to configure the extender.

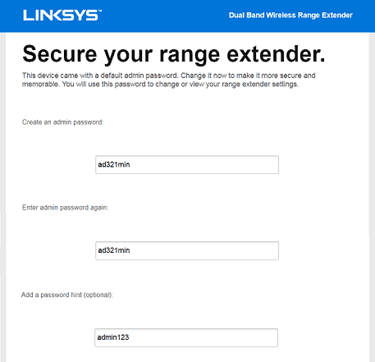
Step 7: First, secure the router with ID and password.

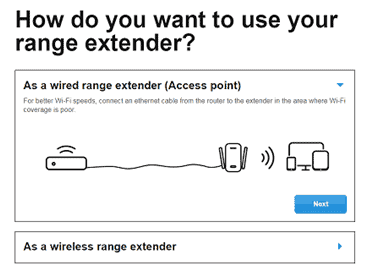
Step 8: Then, choose whether you want to set it up as a range extender or access point.

Step 9: Now, select your main WiFi network and enter the network password.
Step 10: Click on the “Save” button to apply the settings.
Fun Fact: This method enables access to more advanced configuration options, allowing you to customize features/settings according to your needs.
👉 Related Reading: Do WiFi Extenders Work for Gaming? [Expert Insights]
Method 2: Using a WPS Button
This method simplifies the Linksys range extender setup by utilizing the WPS (Wi-Fi Protected Setup) button on both devices (router and extender).
It automatically establishes a secure wireless connection between the two devices, eliminating the need for manual configuration or entering network credentials.
Steps To Set Up Using WPS Button:
Step 1: Place the Linksys extender within range of your main router.
Step 2: Plug in the extender to a power outlet.
Step 3: Wait for the extender’s LED lights to start blinking amber.

Step 4: Press the WPS button on your router.

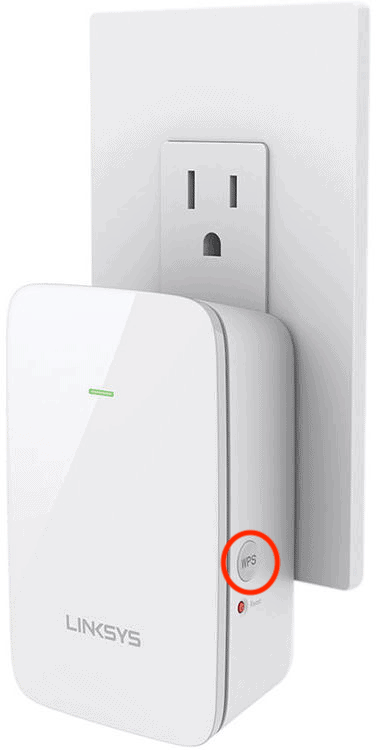
Step 5: Within 2 minutes, press the WPS button on the extender.

Step 6: Wait for the WPS LED on the extender to stop blinking and remain solid, indicating a successful connection. The extender will automatically configure the settings and connect to your WiFi network.
Note: Unfortunately, the Linksys extenders do not offer app support, so you only have the above two explained configuration methods.
How To Connect To a Linksys Extender?
Once your Linksys extender is set up, it will create a new Wi-Fi network with the same name as your router’s network.
On your device, open Wi-Fi settings and look for the extender’s network name (SSID), usually labelled as “Linksys Extender,” followed by a model number or custom name. Select the network and enter the password.
Once connected, your device establishes a connection with the extender, allowing you to enjoy extended WiFi coverage in the desired areas.
👉 Related Reading: 7 Best WiFi Extenders for Gaming in 2025 [Low Ping]
Troubleshooting Linksys WiFi Extender
Here are some common problems faced while setting up a Linksys WiFi extender, along with their quick fixes:
1. Extender Not Connecting to the Internet
To resolve this, ensure the extender is properly connected to the main router’s network. Restart both devices and verify the correct WiFi password.
Adjust the extender’s position closer to the router and consider resetting the extender to factory defaults if needed.
2. Weak or Unstable Signal
Reposition the extender closer to the main router for better signal strength. Avoid placing the extender near obstructions or electronic devices that may interfere with the signal. Check for firmware updates for the extender and install them if available.
3. Extender Slowing Down the Internet
Make sure that the extender is placed in a central location. You can also try reducing the number of devices connected to the extender.
👉 Related Reading: How To Speed Up Your Internet
4. Extender LED Lights Not Working or Blinking Abnormally
Check if the extender is receiving power and properly connected. Restart the extender and ensure it is placed in a well-ventilated area. If the issue persists, consider resetting the extender or contacting Linksys support.
Frequently Asked Questions
Can the Linksys extender connect to any WiFi router?
Yes, the Linksys extender can connect to any WiFi router that supports standard WiFi protocols, regardless of the brand or model.
Does a WiFi extender have to be in the same room as the router while setting up?
No, a Wi-Fi extender does not have to be in the same room as the router while setting up. It should be placed within range of the router’s WiFi signal to ensure a strong and stable connection.
How long does it take to configure the Linksys extender?
The time required to configure the Linksys extender may vary, but typically it takes around 5-10 minutes to complete the setup process.
What is the WPS button on the Linksys extender used for?
The WPS (Wi-Fi Protected Setup) button on a Linksys extender is used to simplify the setup process. By pressing the WPS button on both the extender and the router, they can automatically establish a secure connection without the need for manual configuration or entering network credentials.
Conclusion
In conclusion, connecting a Linksys extender can greatly improve your WiFi coverage and enhance your browsing experience.
It is important to note that during the setup process, you should ensure that the extender is placed in an optimal location within range of your main router for the best signal strength.
Want even more useful connectivity guides? Checkout:
