Is Your WiFi Extender Not Working? [Reasons & Fixes]

Is your WiFi extender not functioning properly? Does it give slow speeds or weaker, unstable signals? Or worse, it’s not connecting to the internet at all? The problems can be many, but the fixes are SIMPLE.
Quick Fix: Restart the extender. Press the power button or unplug it from the electrical outlet, then turn it on again. If the issue persists, worry not. This guide discusses common reasons why an extender won’t work and ways to troubleshoot.
Why Is My WiFi Extender Not Working?
- Mismatched WiFi security settings
- Disconnected, loose, or damaged connections
- The extender isn’t placed at an optimal location
- An internet outage from the ISP
- Issues from the router’s end
- The setup isn’t done well
- Outdated firmware
👉 Related Reading: 5 Best WiFi Extenders for Security Cameras in 2025
How To Make Your WiFi Extender Work Again?
With the following solutions, you’d be able to fix a WiFi extender having issues like:
- Weak or no internet connection
- Signals don’t reach the area as intended.
- The extender is not turning on.
- WiFi signals don’t reach the extender.
1. Power Cycle Main Router
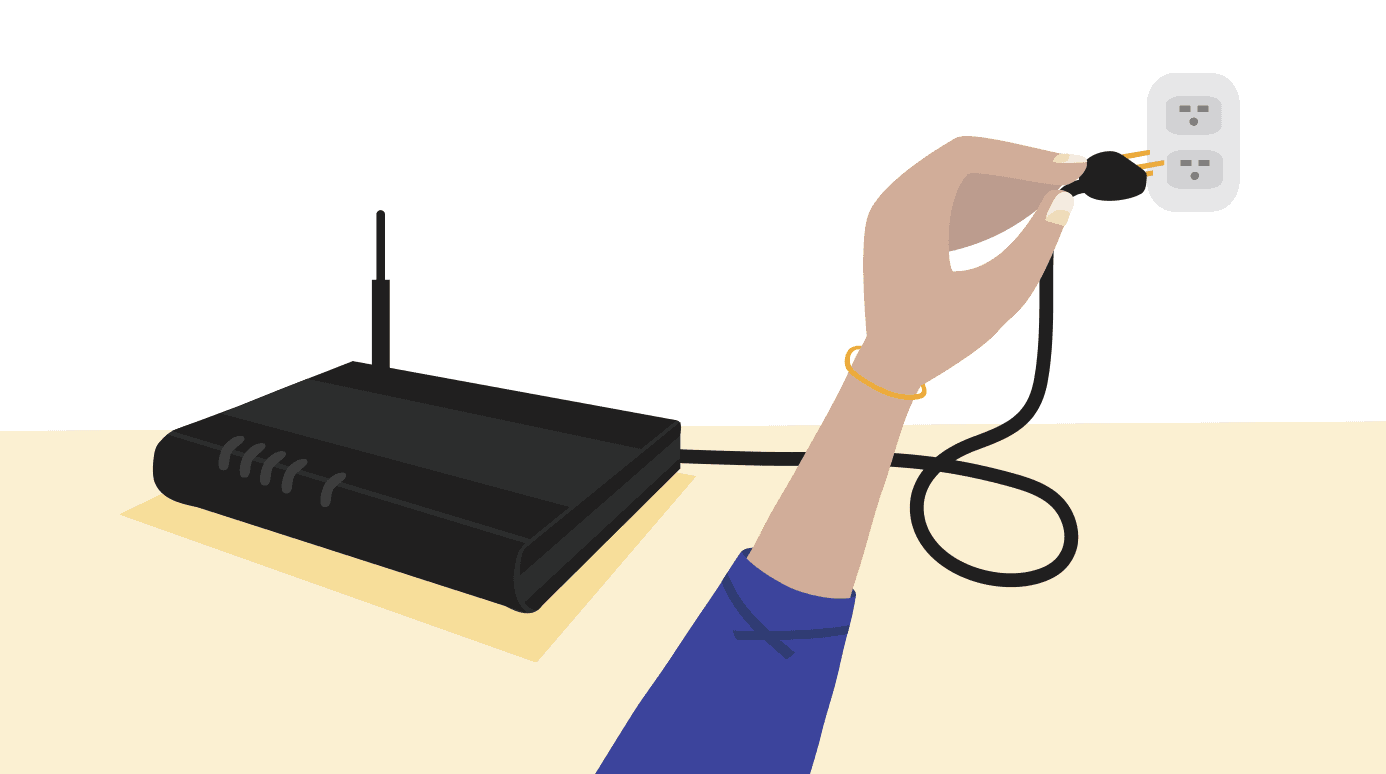
Before you go on inspecting the extender, make sure your router is transmitting signals seamlessly. Similar to our smartphones and laptops, try restarting the router to let it reset and start fresh. What it does is, clean the device’s short-term memory and keep it running smoothly.
Steps To Power Cycle:
Step 1: First, unplug the router, followed by the modem. There are no power buttons, so you only need to pull the power cord out.
Step 2: Keep it unplugged for about 30 seconds and then power it back up.
Step 3: The devices would take a few seconds to boot up, as identified by the activity lights.
Step 4: Try connecting to the internet on your device using the router and extender. If the network from the former works and the latter doesn’t, try fixing the extender.
2. Relocate WiFi Extender

Placing the WiFi extender improperly can also result in an internet-dropping issue. For example, if your device is plugged into a power source behind metal doors or aluminum studs, it might be unable to extend the signals.
Steps To Relocate:
An extender should be installed where it has access to router signals and areas void with signals. The ideal location would be halfway between, but it isn’t available in many spaces. Some Wi-Fi extenders come with location placement assistance which helps you determine the perfect spot.
If yours doesn’t, you must use the “hit and trial” method and install it in different spots to pick the perfect location. But during that, ensure taking care of a few things:
- Do not place it inside the shelf/cupboard or under a table in a corner.
- Keep it away from any electronic equipment.
- Ensure there aren’t metal doors, aluminum studs, or concrete walls blocking the extender.
- Install the extender in a neat and clean area
If the issue persists, proceed to the next step.
3. Re-Run Setup Wizard
Another possible reason behind your extender malfunctioning is it might not be set up properly. So it’s imminent that you re-run the process.
Steps To Follow:
Step 1: Re-setting the extender would require a laptop or desktop with an Ethernet port for wired connection and the cable itself.
Step 2: Make sure the extender is connected to the power source. Then plug one end of the Ethernet cable into your laptop and the other into the extender.
Step 3: Open Chrome/Edge or any similar web browser on your laptop and type in or in the search bar.
Note: If none of the two works, check the manual for the default web interface URL. I had a Netgear extender, so I typed in “www.mywifiext.net” to access the admin panel.
Step 4: You will be redirected to the router’s official webpage, where you must log in with the default username (admin) and password (password).
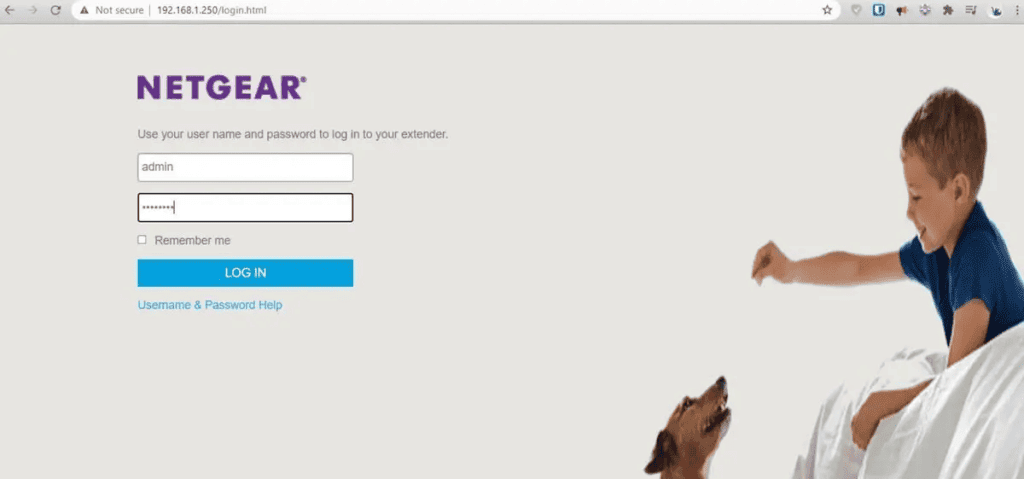
Step 5: As you log in, a setup wizard should start up that guides you through your local network step-by-step.
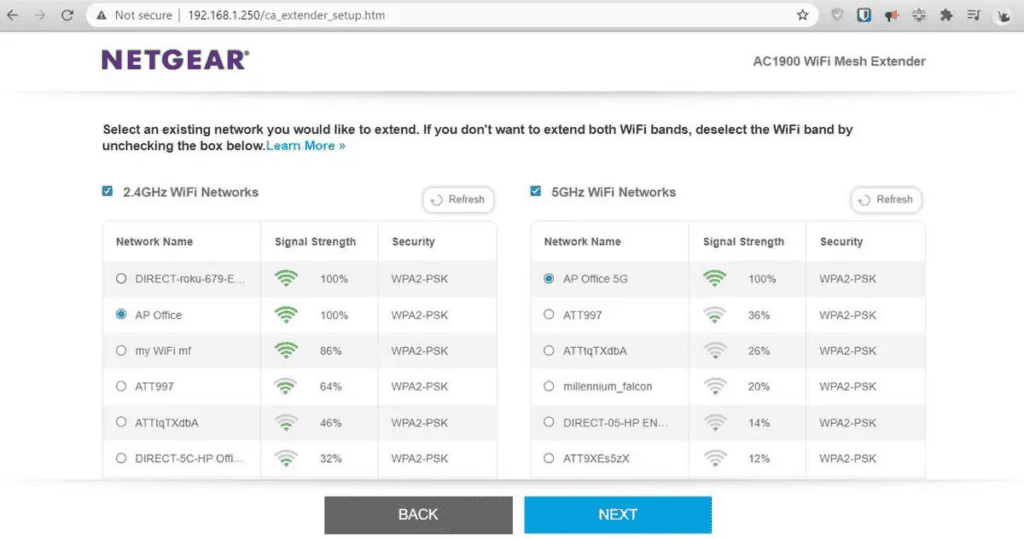
If not, locate the WiFi settings tab and enter the same SSID name and password you use for the router. What you’re doing is logging in to the extender to the router. Once done, the repeater rebroadcasts the same signals transmitted by the router.
3. Reset WiFi Extender
If re-configuring the extender can’t do the trick, it’s time you reset the WiFi extender. It reverts the router settings to default and eliminates any errors.
Suggested Resources:
Steps To Reset an Extender:
Step 1: Use a paper clip to press & hold the reset button for a few seconds.
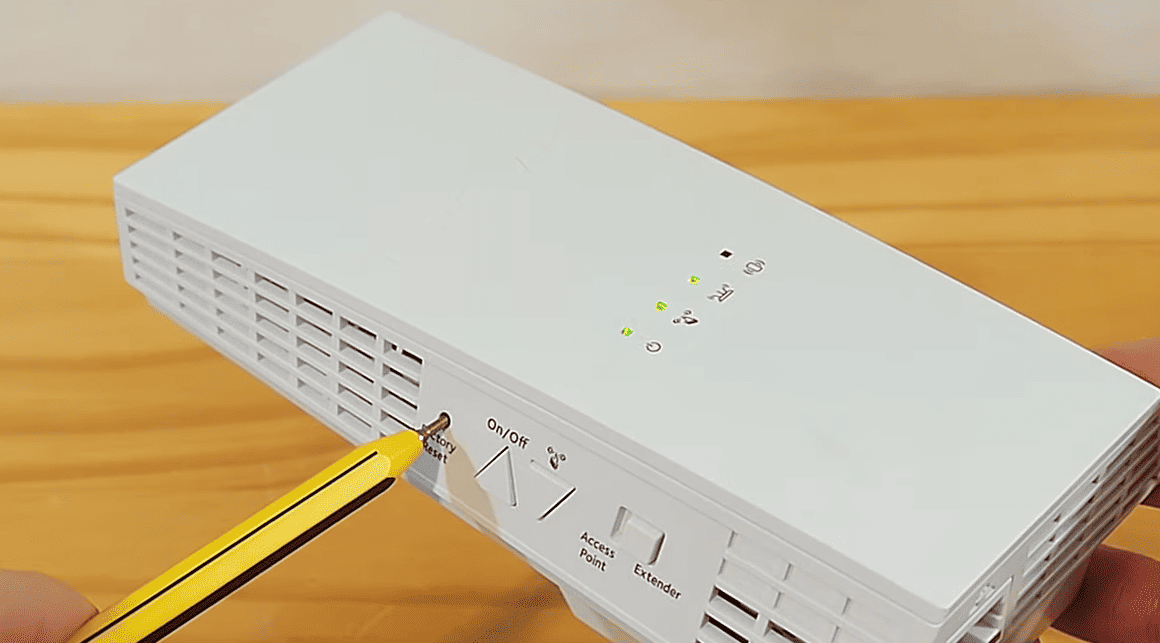
Step 2: The power LED blinks and turns red, which indicates the extender is rebooting.
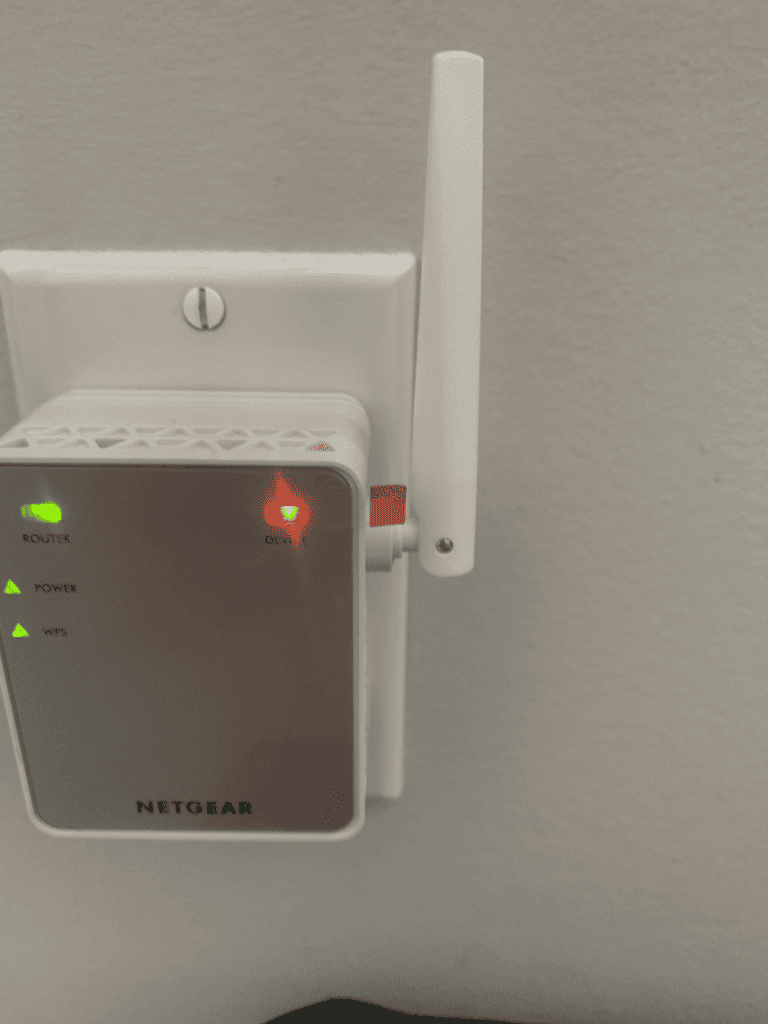
Step 3: Wait for half a minute to access the extender, and try connecting your laptop or other devices. If it doesn’t work, try “restore factory defaults” in the configuration menu. And if none of the two work, proceed next.
4. Inspect for Physical Damage
Due to mishandling, any networking device, including an extender, might inflict physical damage, causing it to malfunction.
Steps To Inspect:
Step 1: Inspect for sharp edges, cracks, deformities, or burrs on the extender. Make sure to check the plugs and Ethernet ports for any damage.
Step 2: If you find any, take it to any technician and repair it. And if the damage is beyond repair, it’s time to replace it with a new one.
👉 Related Reading: 7 Best WiFi Extenders for Gaming in 2025 [Low Ping]
5. Update Firmware
If your extender is not doing the usual, there’re chances that its firmware is long outdated. Just like any operating system or software, an update is important for an extender to ensure its normal functioning.
Steps To Update:
Step 1: Make sure the extender is powered up and connected to the router’s WiFi. I am taking the example of the Netgear Extender.
Step 2: Connect to the extender’s wireless network using your laptop or desktop. It should have the name “MyWiFi-EXT” or similar.
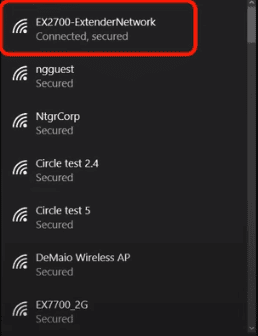
Step 3: Open a browser (Chrome, Edge, or any other), search “www.mywifiext.net,” and press Enter.
Step 4: It redirects to the login page, where you must enter the default username and password. Once logged in, it automatically checks for new firmware.
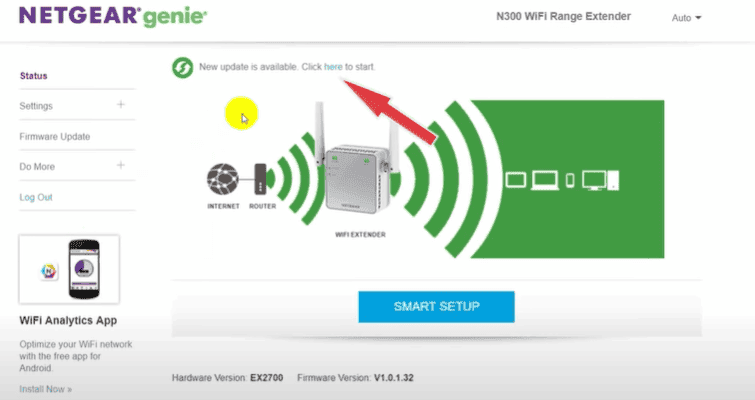
Step 6: Download the latest available firmware. Please be patient for the process to complete.
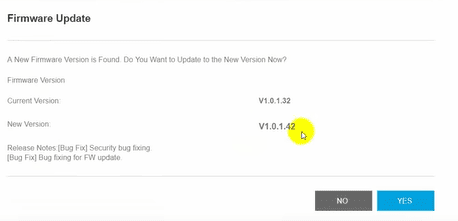
Step 7: Once download and installation are complete, the extender will reboot to complete the update. Your computer will lose connection while the extender reboots. Once done, you can reconnect to the extender’s WiFi. That’s it, you’re done.
Step 8: Optionally, you might re-visit the online portal to check if everything worked out.
Although I have used the example of a Netgear extender, the process is identical for any extender except for the online portal address.
6. Contact the Support Team

Updating the firmware should get your WiFi extender back on track, and if not, only the technicians can now do something about it. You can usually find their contact information on their official website or through their customer support channels, such as phone, email, or live chat.
Frequently Asked Questions
Why does my WiFi extender keep disconnecting?
An issue of this kind occurs if the extender is running on outdated firmware or any of its settings is off. You can fix this issue by updating the firmware or resetting it.
Why are my WiFi extender’s lights not on?
Here are a few reasons why:
- The extender isn’t plugged in properly to the power source.
- There might be a fault in the extender itself.
- The indicator lights are not in working condition.
How do I fix the extender not connecting to the internet?
Here are a few ways to do that:
- Updating the firmware
- Reset the extender
- Re-setup the extender
- Check for any physical damage
- Make sure it has access to router signals and there aren’t any obstructions.
Why does my Wi-Fi extender says connected but no internet?
Here are a few reasons why:
- Make sure you have set up the extender properly following the manufacturer’s instructions.
- The extender might be too far from the router, or it’s in an area with signal interference.
- Signal strength is too weak to provide a connection.
- Extender is incorrectly configured.
Conclusion
Regardless of whether you’ve got the best WiFi range extender, it’s bound to malfunction at some point. I hope this guide helped you get your device up and running.
